
Wide angle factor 0.86X
Coverage 75 MM

Focus throw 150 0

minimum focus 2'0.4"0.62M

filter threads 86 MM

Weight 0.8lbs350g

size 2.0"5CM

get in on WWW
 Focuser by Lucas Pfaff
 Single Focus : Variable Diopter
 Mount: M75*
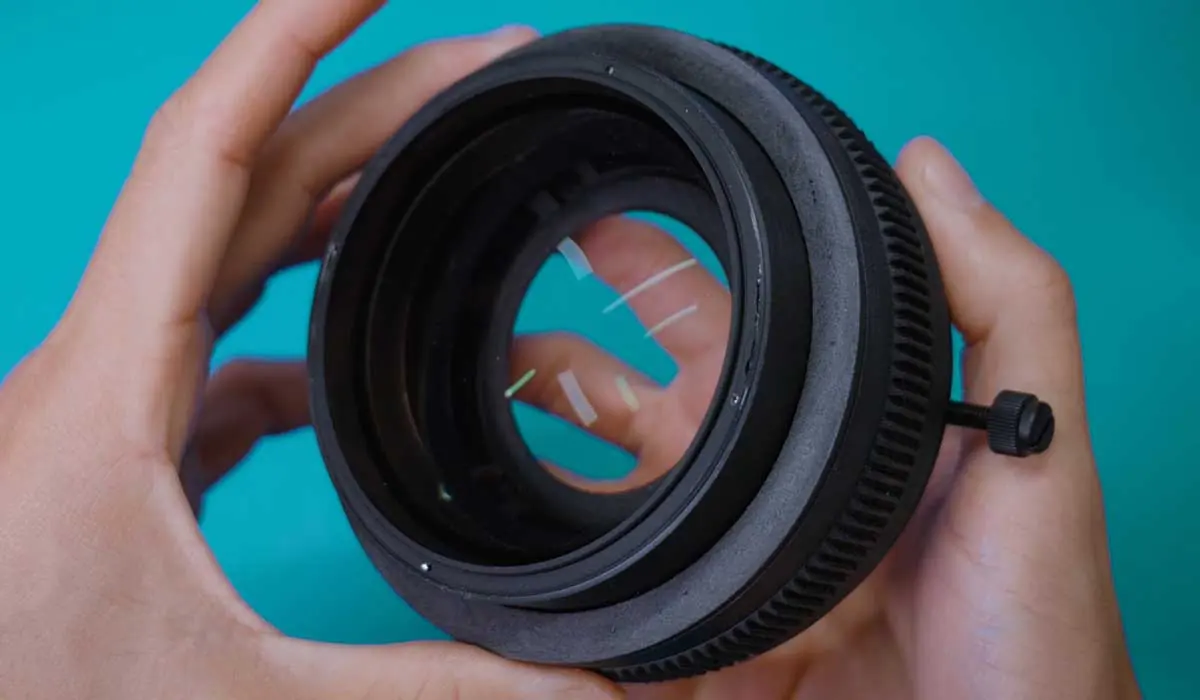
The Pfocus was created by Lucas Pfaff and it’s got fully 3d-printed mechanics. Well, not really “fully 3d-printed” I guess since you still need a couple screws and nuts. They’re all very clearly detailed in the manual, so make sure to take a look at that before starting your build.
The key element and hardest part to find is the glass. The focusing optics in the Pfocus (gotta love these puns) are harvested from the Fujinon WCV-82SC.
All the standards for these things are in metric system, so if you’re in Canada, US or UK, you might have to go the extra mile to find the proper sizes. I couldn’t find mine so I resorted to asking Lucas for help! Printing all the parts took a couple days.
The Pfocus weighs about 350g. It extends 1.5cm or 0.6 inches from infinity to minimum focus and the focus throw is 180 degrees. Lucas gives you the option of having it in Canon or Nikon focus directions. Focus gears are built into the model, so no need to worry about that.
Minimum focus comes to 50cm from the front of the lens, which is closer than most focusers out there. The Pfocus exploits the optics used in wide angle adapters. This is not a wildly popular piece of info, but most two-element wide-angle adapters are made of a very strong positive and a very strong negative diopters. The distance between them is what defines the total power of the system. When they’re the closest, the system’s power is +0, and that power increases as the distance between the glass increases, maxing out at +2 - which gives you the 50cm minimum focus.
You’ll have lots of choices when it comes to mounting and front threads - you make these decisions while choosing the parts to print. You can have no front threads, 77 mil threads or 82 mil. For mounting, you can make it with 75mm female threads like the Rapido FVD-16a and Rectilux HCDNA, 77mm regular male filter threads, or a universal mount which works like a clamp - and that’s the option I chose.
And how much does this thing cost? I’ve estimated the printing costs using Shapeways it came out much pricier than I expected, at $130! It also had an average delivery time of a month from the date the order was placed, so I’d say find a friend with a printer and bother them. You’ll have way more control over the specs, which is a good thing for this project.
The screws and additional parts should cost you less than $20.
The Fujinon adapter can cost anything from $60 to $200, so hunt for a good deal. This is the most expensive part of this build - unless you decide to go with Shapeways for printing!
If you manage to get everything for cheap, we’re talking about less than half the price of SLR Magic’s Rangefinder.
Sharpness is alright. It struggles when wide open, with a lot of magenta fringing on high contrast edges, and things get considerably better as you stop down. Edges are messed up in all scenarios. For the center, f/2.8 is alright for on the wider taking lenses, but things get worse as we move towards longer focal lengths.
For flares, once we add the Pfocus, flares remain the same! There's an increase of veiling glare but no additional streaks. It's impressive to see how much the veiling glare affects the picture.
Because the glass comes from a wide-angle adapter, you’ll get the same effect on your images. When looking at infinity-focused pictures, the Pfocus makes your frame 0.84 times wider, which is usually not a bad deal. We all want to go wider when shooting scope, right?
In terms of coverage, when we add the Pfocus to a clean Cinelux on a 50mm, there's no additional vignetting but the image gets wider - as I just explained. You can get away with 35mm on MFT as I did in the opening test shots, but on full frame, even 50mm requires either a bit of crop to clear or a more lenient iris setting than f/8. 85mm clears the frame completely for the used sensor area. You can see a little bit of vignette on the top right corner still.
Breathing is quite pronounced with the image squeezing and stretching when I rack focus. I find this to be an awesome feature to draw attention to anamorphic character, but it can be a bit much for some people in this case.
I was pretty shocked with this focuser. We bash plastic lenses all the time, but the lightness of this thing was a blessing. The feeling of having built it myself, like some sort of high-tech lens lego made the experience of using it - and having it work properly - so incredibly rewarding. I would go as far as saying this has been one the most rewarding experiences I had on this channel. It’s right up there with anamorfaking and learning about the insides of lenses.
Coverage isn’t super amazing and I constantly found dust inside the lens. That’s when I realized I missed the grease when assembling it the first time and I was seeing debris from the focusing action! After I added the grease the dust issue disappeared.
It was also a super easy lens to adjust. I put it together and took it apart more than ten times by now, and every time I get a little more confident that nothing is going to break.
Huge props to Lucas Pfaff for designing and sharing this thing for free. This is top notch work!